Brief synapsis: Squeak turns 7 soon, so clearly I've managed to keep her breathing, in spite of all predictions to the contrary. We've been at this location nearly 5 years. I like my job. I'm dating someone who is living here during covid, which has been a major adjustment for me. So, it got better and we're okay.
Yesterday, in honor of Star Wars Day, I made cookies. Squeak helped.
And then I got distracted, and unfortunately, C3P0 and Yoda didn't make it.
You know, I giggle EVERY time I say that. Every. Time. And I've been bothering my coworkers ALL week. In retailiation, *someone* plastered Star Wars stuff all over my cube yesterday.
I was determined to not miss it this year so Wednesday, I spent some quality time researching recipes. That was kind of a bust, except I stumbled across a blog post of cookies in these great Star Wars shapes. (On a side note, this lady does AMAZING things with icing. I lost a couple hours wandering around her blog. And I got a new tip - roll out on parchment paper, and turn the paper every few rolls. Presto! No more cookies stuck to my counter! Yay!) So then I wandered further and found someone else raving about the cookie cutters available at Williams Sonoma. Holy crap, y'all! I had NO idea! I called the store nearest me, and they put the twosets I wanted behind the counter for me. Also, they were on sale online so Sam left a note to match the price for me. I picked them up on my way home that night. So happy!
Last night, I did my typical play-online-procrastinate-procrastinate-omg-it's-bedtime-and-I-haven't-started-baking-yet thing. Good that some things stay the same, right? *snort* Happily, my mom's sugar cookie recipe is pretty much impervious to screw-ups. I was a bit worried 'cause it was HOT in my house last night but it all worked out okay.
Crumbly is OK.
Darth First!
Darth & Storm Troopers
X-Wings & Yoda
Normally I go all kinds of bonkers on the decorating but I was just too tired last night. I knew this because I could not get the glaze to the right consistency. I struggled and struggled with it, and used most of a new bag of confectioners sugar. Nothing turned out right with the decorating, so please excuse how pathetic the poor things look. They taste delicious, that helps, right??
My first step was making the black for Darth. Thanks to a quick trip online to the Wilton forums, I had an idea of what would work. I added about 2 heaping tablespoons of unsweetened coco powder to probably a cup and a half of glaze and mixed well. Then I used Wilton's paste color in violet to turn it black. That paste is intense! It didn't take nearly as much as I thought it would. (It just took a couple globs of the paste on a toothpick. Seriously way less than a pea.)
Yes, I trash my kitchen. I bake like the Swedish Chef.
At some point, I decided to add sparkle. I have no idea why. So I went for the black sugar I have for Halloween. Instead of sparkle, Darth looks like he has mange. Sigh. I'll know better next time.
I used the glaze as-is for the X-Wings and the Storm Troopers. Again with the sparkly - I scattered blue sugar on the X-Wings and called it a day. I attempted to add black details to the Storm Troopers but the glaze was too thick, then too thin so I washed it off and called it good enough.
Poor naked looking little things. I'm sorry.
They sorta look like X-Wings. If you squint.
To get the green for Yoda, I used the Wilton paste color in Leaf Green. Again, just a small amount - I dragged the toothpick thru the glaze twice in probably close to 2 cups of glaze. Then I added small amounts of the black, stirring well each time, until the green was close enough.
At least his color is close.
I left my kitchen in the shambles and stumbled off to bed while they dried. This morning, I loaded them up on a platter and brought them into the sugar vultures at work.
Next year, I'll decorate them properly...
Anyway, have a great Friday and May the Fourth be with you!
Update: Heh. A coworker just emailed this: "Good these cookies are! Awesome you are!" Totally made the lack of sleep worthwhile!
What with the new jobs and moving and general chaos, it's been a while since I spent any time being creative in the kitchen.
Yup. New job. I started on January 9 at a new company, back in supplier quality. So far, so good! The only fly in my ointment right now is the 26 mile (each way) commute. As much as I love Petunia, gas mileage is NOT her strong suit.
The new job means, of course, new coworkers. And I like most of these people, which is a significant change over the last job and probably has a great deal to do with my willingness to spend hours slaving over hot icing.
I doubled this recipe, and it made 25 heart cookies. Each of them was approx. 3 inches across at their widest, and probably 1/4 inch thick. I LOVE this recipe... it's quick, you don't have to chill anything or fool around with it, it works fine with my kitchenaid mixer; it's forgiving, and since I'm usually baking at 1 am, this is a good thing; and the cookies taste fantastic.
My Mom's Cut-Out Cookie Recipe:
1 stick butter
1 cup sugar
1 egg
1/2 teaspoon vanilla
2 cups flour
1/2 teaspoon baking soda
1/2 teaspoon salt
Cream together butter and sugar. When well mixed, add egg and vanilla. Sift together dry ingredients and add gradually. Note: once you start adding flour, you can toughen the cookie with handling. Use a low speed and be gentle - don't mess with the dough any more than you have to.
The dough will be kinda crumbly looking in the bowl. Lightly flour your work surface, grab enough dough to make a softball-sized ball, form the ball, then roll out. Thickness is up to you; I prefer these cookies a bit thicker so 1/4" is perfect. Use your favorite cookie cutters, then place cookies on a lightly greased cookie sheet. I just use my counter as my work space, and the dough will stick a bit. I have an offset spatula (from the Wilton Tent Sale, of course) that I use to remove the cookie from my counter. It is totally worth paying retail for one of these things, just in the sheer frustration saved.
I take my softball-sized ball, roll it out, fit as many cookies in as possible, and then put the bits off to one side. (I save one little bit to use as a thickness gauge for the new ball of dough.) Make another ball from the bowl (finish off what's left in there if doubling) and repeat. After I've used all of the "fresh" dough, I combine the scraps for the second run, and then the third.
Here they are on my wonderful HUGE cookie sheet (also from WTS)...
Bake at 400 degrees. I put them in for 6 minutes, then turn the cookie sheets and give them another 3 - 4 minutes. This will vary with your oven, size and thickness of cookies.
Scoop them off the cookie sheet onto a cooling rack and let them cool completely.
Icing:
3/4 cup sifted confectionars sugar
~ 3-4 T water
food coloring
For the double batch of cookies, I used 2 cups of confectionars sugar, started with 11 T of water, and then just dumped a bunch more water in until it was the right consistency. Then I put some in another bowl, and added red food coloring. You can just brush the icing on and call it a day. I broke out the syringes, paint brushes, toothpicks, and my sprinkles collection.
For the marbled ones, I used the brush to paint on a layer of icing in one color, then I had another color of icing in the syringe. Put a squiggle of the other color on, then pull a toothpick thru in straight lines like you are drawing a checkerboard. It works better if you "draw" each line in a different direction. (So vertical line up, vertical line down, vertical line up all the way across. Then horizontal line left, then right then left, etc all the way across.)
Once the cookies were iced, I stumbled off to bed and left them to dry.
Any time I use confectioners sugar, I have an explosion with it and have to clean EVERY surface. Seriously, it's like my super power, to make confectioners sugar cover every square inch of my kitchen. Happily, my cabinents are white so it's hard to tell. The visible aftermath was bad enough...
All packed up and ready to go for Valentine's Day:
I brought these in for Valentine's Day on Tuesday. They were joined by my coworker's chocolate cake (OMG, best chocolate cake I've ever eaten!!), and her chocolate covered strawberries.
Then came Thursday, and this coworker's birthday. I'd ended up agreeing to bake the birthday cake but after Tuesday, I decided that bringing this woman a chocolate birthday cake was like bringing inferior tea to the Chinese - maybe not the best idea ever. So I went with a favored standby: Texas Sheetcake.
CAKE:
2 cups all-purpose flour
2 cups white sugar
1 teaspoon baking soda
1/2 teaspoon salt
1/2 cup buttermilk
2 eggs, lightly beaten
1 cup butter
1 cup water
4 tablespoons cocoa powder
1. Preheat oven to 350 degrees F. Grease and flour a jellyroll pan.
2. Combine the flour, sugar, baking soda and salt in mixer bowl.
3. Add butter, water and cocoa to saucepan; bring mixture to a boil then remove from heat. Add cocoa mixture to the flour mixture, mixing until blended.
4. Beat in the buttermilk and eggs.
5. Pour batter into prepared pan. Bake in the preheated oven for 20 minutes, or until a toothpick inserted into the center comes out clean.
6. For the icing: In a large saucepan, combine the milk, cocoa and butter. Bring to a boil, then remove from heat. Stir in the confectioners' sugar and vanilla, mixing until blended. Spread frosting over cake. (Cake can be warm or cool when iced.) If desires, sprinkle nuts over top. (I usually put nuts on half the cake.)
So, yeah. I've pretty much spent the whole week in a sugar coma. I'm going to go have a salad for dinner tonight.
My friends gave me their old dehydrator when they got a bigger one for Christmas last year. I have only used it a couple of times but this totally makes storing it worthwhile! Another kitchen tool that I have but seldom use is the mandolin. So making apple chips is awesome in many ways - I get to play with seldom-used kitchen gadgets AND I get super yummy and nutritious snacks out of it. Win win!
This "recipe" is from the same friends that gave me the dehydrator. We went to Sam's Club the other day and found big bags of Jonagold apples. We both squeaked with joy and pounced.
Ingredients: Apples (I prefer Jonagolds for this.) Orange Juice
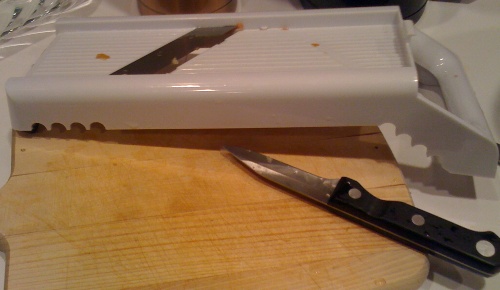
Directions: Pour orange juice in a bowl. Wash apples, quarter and core them. Use mandolin with thickest slicer attachment (mine is about 0.25 inches) to slice apples.
As each quarter is sliced, put slices in bowl of orange juice.
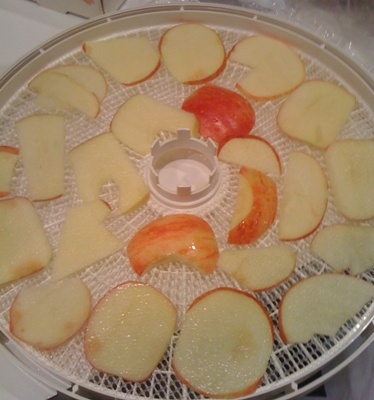
When the bowl is full, arrange slices on dehydrator trays.
Stack the trays, turn it on and let it go. (I use the middle of the fruit setting - 135 degrees.) After a couple of hours, I flip the chips over to keep them from sticking to the trays. I also restack the trays with the top on the bottom, front in the back to ensure even air flow.
They're done when the apples are dry to the touch. Or you can't wait anymore, whichever comes first. I store mine in freezer bags in the cupboard, but they never last long - it's an act of will to not snarf them all down as soon as I turn the dehydrator off.
If you don't have a dehydrator, you can probably use the oven on its lowest setting. You should try, 'cause these things are seriously delicious!
The final peach canning adventure o'the year: peach honey
When I was peeling and cutting up all of those peaches, I saved the skins. I also saved the bits that I cut out from the center that had pit bits on them. These have been sitting in the fridge waiting for me to reclaim my kitchen from the last peach project.
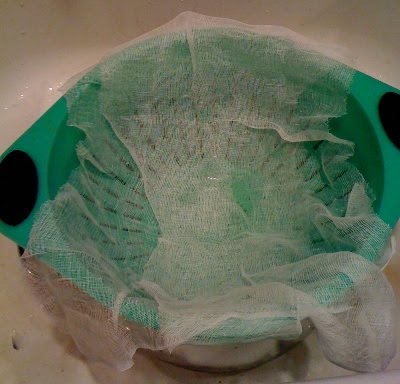
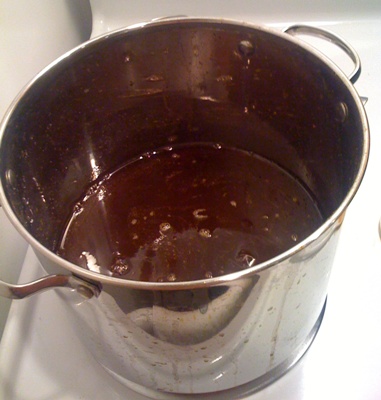
Today, I put that whole bowl full of peach stuff in my largest stock pot on the stove, covered it in water and let it gently boil until I had peach juice. Then I used cheese cloth to stain out all of the big chunks.
Waiting...
Yuck!
Peach Juice!
I'm actually not sure how much sugar I added to the juice. While at the peach shed, I also bought a jar of peach syrup. OMG it was sweet. Holy crap. I couldn't taste the peach at all, it hit the taste buds and the only things running through my mind were - SWEET! NEED WATER! GAH! Pretty much just like that. So I used a cup of it in the spiced peaches, and the rest of it (probably about a cup) in the honey.
The theory is that this will thicken as it cooks down, and maybe if I'd have just added sugar it would have. This did not. I went from the stock pot being 3/4 full to less than a 1/4 full and it was still really runny. So I added a package of pectin. Still runny. *sigh* Fine. Be runny. I packed it in the jars and put them in the water bath (wiping down the rims before adding the lids, of course) and it's still not thick. The package insert in the pectin said that sometimes it takes up to two weeks for jam to thicken, so I guess it's not impossible that it'll thicken in the jar...?
At any rate, this concludes this year's adventures in peach preserving. We'll see if I ever do this to myself again. This will partly depend on whether anything I've put up is actually edible... Right now, looking in my cupboard at the jam, the spiced peaches, and the honey, I'm feeling very capable and proud of myself!
When I was growing up, Del Monte sold glass jars of spiced peaches. They were hard to find and only available around Thanksgiving and Christmas. My mom LOVED them. We, her beloved children, were lucky to get one to split between the two of us. Last summer, when friends brought South Carolina peaches back, I started thinking about making my own.
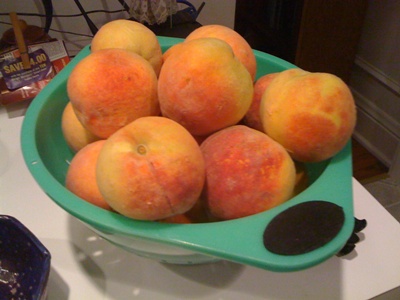
This summer, I have three big baskets of peaches to consume.
I went surfing through the internets, and found afewrecipes that were helpful but none that seemed exactly right. So, I ended up making my own road.
My recipe: ~50 peaches ~3/4 cup lemon juice 2 cups apple cider vinegar ~3 cups sugar 12 cups water 1 cup peach syrup 1/4 cup mulling spices
The very first step is preparing your jars. Wash in hot soapy water, rinse and then put jars in water bath and boil them for 20 minutes or so. Wash and rinse lids, put in a small pot, boil for 5 minutes. (I set up a TV tray next to the stove, and covered it with towels. Then I left the jars in the water bath until I was almost ready for them, then pulled them out (empty water back into bath to avoid having to refill bath) and set them right on the tray.)
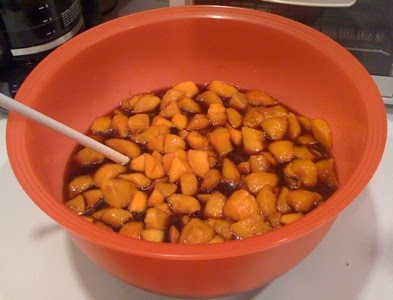
The first steps - boiling and peeling - are the same as before. I wanted 6 quarts of peaches, so I peeled about 50 peaches. From what I've read, whole peaches are the Southern tradition, but I'm a displaced Yankee so I pitted and sliced mine. Put the lemon juice in a LARGE bowl. As you slice the peaches, drop them into the bowl. Stir occasionally to ensure all peaches are covered in the lemon juice. (If you prefer, you can probably also use that fresh fruit stuff to keep them from discoloring. I just happened to already have lemon juice.)
Add vinegar, sugar, water and syrup to your LARGEST stock pot. Wrap mulling spices in cheesecloth and add to pot. Bring to a boil. Boil approx 5 minutes covered, uncover, boil another 5 or so minutes, add peaches and then simmer until peaches are soft (~20 minutes). Note - I had to remove liquid when I added the peaches to avoid overflow so be careful.
When peaches are about ready, pull jars from the water bath, line them up on your work surface and add 1/4 teaspoon of mulling spices and 1 teaspoon sugar to each jar. Fill jars with peaches, using jar funnel and slotted spoon, then top off with syrup, leaving about an inch of headroom. Wipe off lips and threads of jars, add lids and rims and the process in hot water bath for about 30 minutes.
I've made pie. Cobbler. Milkshakes. Smoothies. Daquiris - oh my!
I've boiled. And blended. And purayed. Chopped and infused various adult beverages. And I'm not quite half way through the darn things. I'm happy to note that the *ahem* digestive side effects from eating too many blueberries do not apply to peaches. (Good, 'cause THAT was... disconcerting.)
Not one to suffer alone, here's a closer view of making my own peach leather AND my first ever attempt at canning.
First step: sorting the peaches by my feeble ability to tell ripeness.
Some were perfect just to snack on, or for immediate use in milkshakes and smoothies.
The steps begin the same way for most of the processing. Step one of these recipes is always "peel and slice peaches" like it's really THAT easy. Three hours later, I've got peach goo in my eyelashes and my kitchen may never recover. You'd think there'd be some way to phrase that to warn a person what was coming! Sadly, they are correct in that the easiest way to peel a peach is to boil it for a while, shock it in cold water and then scrape the VERY slimy skin off the peach. These peaches were not as ripe as they could have been. The good part was that I had a couple of weeks to dawdle around and get them processed. The bad part was that they weren't as sweet as last year's peaches, and the skins did not just slide off most of them. It was a battle. So far, I think I'm winning but the war is yet over.
So, boiling:
Blanching (or shocking):
Skinning:
At this point, we have options, depending on what we're doing. I tackled peach leather first so that is where we go next.
Cut up in blender: (I love my blender. That thing could chew up a car if I asked it to, and - best part - it's got low, high, off instead of 40 buttons whose function completely escape me. LOVE my blender.)
My bananas were REALLY dead, so the first batch was only peaches and honey in the blender.
Make very sure that you have oiled the trays to the dehydrator 'cause this stuff is STICKY. I used a light coating of Pam and then smeared it around for a while with my finger to make sure every spot was covered.
About 10 peaches mostly filled my blender. For the second go-round, I also added one ripe banana per blender-full. (Best is about one day past when you want to eat it, for me anyway. And it makes a huge difference - with banana tastes much better to me than without.) I have six trays for my dehydrator, but one of them doesn't have the fruit leather plastic tray. For the first batch, I used a piece of parchment paper (also oiled) and it worked fine. It took approximately 3.5 - 4 full ladles of puray to fill each tray, and each blender full filled 3 trays. When I got overenthusiastic on one tray, I used a turkey baster to suck it up and move it.
I set the temperature at 135 degrees and let it go. This dehydrator is several years old so that may have something to do with it. Also, I'm in the South in the summer so the humidity is hovering around 85% but these took all of 18 hours to dry all the way. (When it feels dry to your touch and there are no shiny spots, it's done.) Once the peach leather was done, I ripped it into pieces (each approximately 3" x 4"), piled them up about an inch high on waxed paper, wrapped them, put them in a ziplock freezer bag and put them into the freezer. They'll keep pretty much indefinitely in there.
~~~~~~~~~~~~~~~~~~~~~~~~~~~~~~~~~~~
I also filled ice cube trays with puray and froze them. They're living in my freezer in a bucket waiting for a daquiri party. There are about as many peach daquiri recipes as there are people who drink them out there. If you would like help getting started, here's a good one:
(Note: I use 2 cups of peach puray cubes instead of the 1 cup of peaches and 1 cup of ice, and I'm out of brandy so I skip that part. Don't buy superfine sugar, just put the sugar in the blender first and pulse it a few times. Presto! Superfine sugar!)
1 cup frozen peaches 1/4 cup lime juice 1 1/2 ounces light rum 1 ounce peach schnapps 1/2 ounce apricot brandy Dash of pure vanilla extract 1 tablespoon superfine sugar 1 cup crushed ice
Combine the peaches, lime juice, rum, schnapps, brandy, vanilla, and sugar in the blender until smooth. Slowly add the ice with the blender running and process until smooth. Serve in a chilled glass.
Makes 1 serving.
~~~~~~~~~~~~~~~~~~~~~~~~~~~~~~~~~~~
And for my next adventure: canning.
First up: Peach jam with brown sugar and rum. I found the recipe online here, and (being me) altered it slightly.
The boiling, shocking and peeling remain the same. Then I cut up the peaches and put them in a large bowl. I wanted 12 half pint jars, so I used approximately 36 peaches. (Figure 4 medium sized peaches in a pound, and some of mine were a bit scrawny so I went a bit over. I might have snacked a little as I worked too.) I worked in batches, boiling about 7 peaches at a time. I cut them up in a size similar to that for an apple pie. My reasoning was that there were a few peaches that I cut bad spots out of and then peeled without the boiling - I cut them up more finely in the theory that they'd all get done about the same time. I didn't have light brown sugar, so I used dark. And my lemon juice came from a bottle in the fridge.
It was getting late, and I was getting tired, so my measurements got a bit fuzzy at this point. (Also, I subscribe to the Swedish Chef cooking methodology. Bork! Bork! Bork! So all measurements are approximate!) AND, calculations were involved as I ended up with 11 cups of peaches. *sigh* So, 3.67 cups of brown sugar, 11 tablespoons of lemon juice, and somewhere around 0.75 cups of rum (Captain Morgan's spiced rum) went into the bowl with the peaches. I stirred it, covered it and left it on the counter while I went to bed.
The most important part of canning is preparing the jars. No sense in wasting all that effort and potentially poisoning yourself if you can avoid it. I'm still working out how my new dishwasher works, so I washed the jars, lids and rims by hand in hot soapy (yay, Dawn!) water. Then I put the jars into the water canning pot, and the lids into another small pot of water on the stove. I boiled the jars for about 20 minutes, and the lids for about the same. I left both in the hot water until my jam was about ready to pack and then I pulled the jars out and set them on a towel covered TV tray right next to the stove.
(The water bath pot is HUGE and ate two burners of my stove. This is the first time - possibly ever - that I've had all four burners on at once.)
The next day, I put the peaches on the stove and brought them to a boil while my jars and lids cooked away on the other burners.
The recipe says to cook until the peaches become translucent. I have no idea what they're talking about - that never happened. I cooked them until even the biggest chunks were soft and cooked. Then I added 3.67 cups of granulated sugar and boiled it rapidly. BE CAREFUL! This stuff is like napalm and it spits! (Only two of the burns from the flying jam bombs blistered...) I tried two or three times to get that "wrinkle, not run" thing that they talked about and it didn't really happen. I used a digital candy thermometer and went up to 225 degrees for a while, got sick of being spattered with burning pain and called it done. I decided that it looked too chunky to be proper jam, and REALLY wished for an immersion blender. Then I pulled out my potato stomper and squished the peaches 'till it looked more like jam to me. I let it cool on the back burner for a couple of minutes and then stirred in about 0.75 cups of rum and let it boil for two minutes.
Then I used a ladle and the funnel and filled the jars. I had exactly enough for 12 half pint jars. It's better to be lucky than good, I think.
From there, I wiped down all of the jar lips and then used the handy dandy lid grabber magnet that came in the canning set (with the funnel, jar grabber, and air pocket destroyer thing) to snatch the lids out of the hot water and drop them on each jar. Then the rims went on - using towels to keep from burning myself even more. Then all the jars went into the water bath.
The recipe says to process for 15 minutes, but all of the others that I looked at online (and there were MANY) all said 30 - 35 minutes, so that's what I went by. I started the timer when I noticed the water was boiling, so they did process for a bit longer. Then I checked them when the timer went off and the damn water wasn't boiling. I had other things to do, so I got ready to go, turned the stove off on my way out the door and let them sit in the water bath overnight. The next morning, I pulled them out and put them back on the towel covered table and let them cool completely. All 12 jars sealed, so that made me happy.
Walmart sells the pretty quilted half pint jars and the normal ones for the same price and the pretty ones come with a nifty little label. So, if I do this again, I'm going for the pretty ones.